
![]() Learn how to enable root access in OSX 10.9 (Mavericks) but hopefully it should work in other variants). After you complete the steps listed you will be able to use the su command at the Terminal (command line). I have found this most useful when installing tools that can only be installed via the command line. For purposes of security I disabled the root access when I’m finished doing the install.
Learn how to enable root access in OSX 10.9 (Mavericks) but hopefully it should work in other variants). After you complete the steps listed you will be able to use the su command at the Terminal (command line). I have found this most useful when installing tools that can only be installed via the command line. For purposes of security I disabled the root access when I’m finished doing the install.
1. Click on Users & Groups

The following dialog window appears.
2. If the padlock (bottom left of the dialog) is locked then click it. If it is already unlocked then go to step 4.
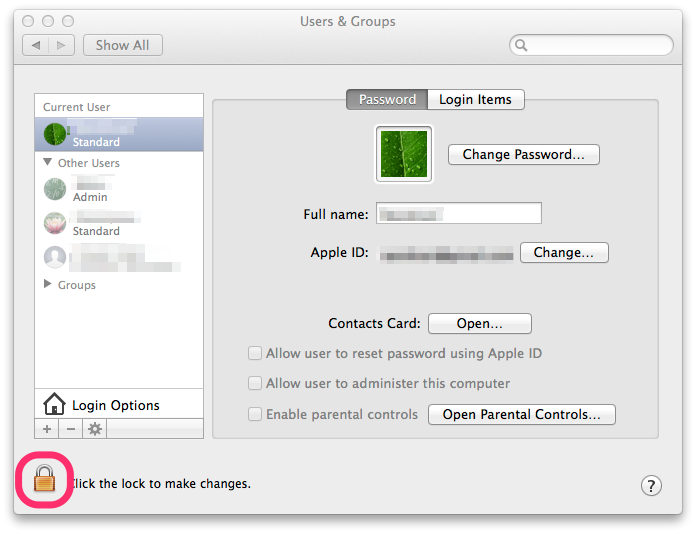
3. Enter your Administrator username and password. Then click the Unlock button.

4. Click on Login Options.
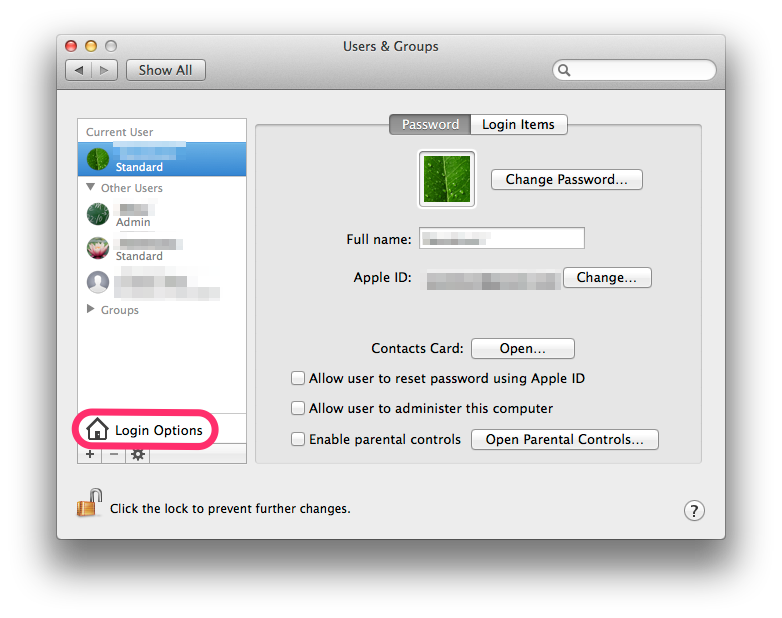
5. Click the Join… button.

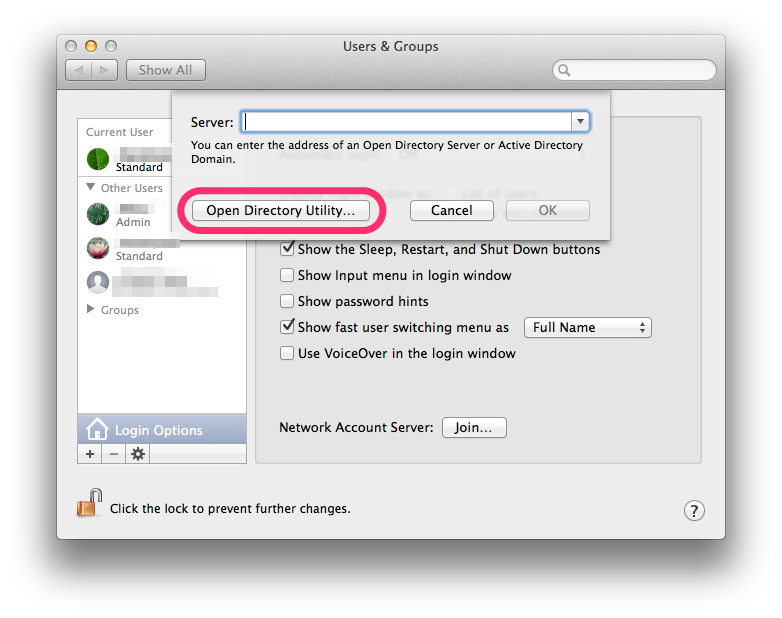
6. Click the Open Directory Utility… button.
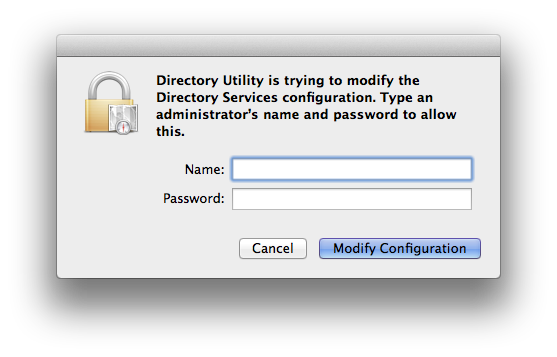
7. If the padlock is locked (bottom left) then click on it. Otherwise go to step 9.
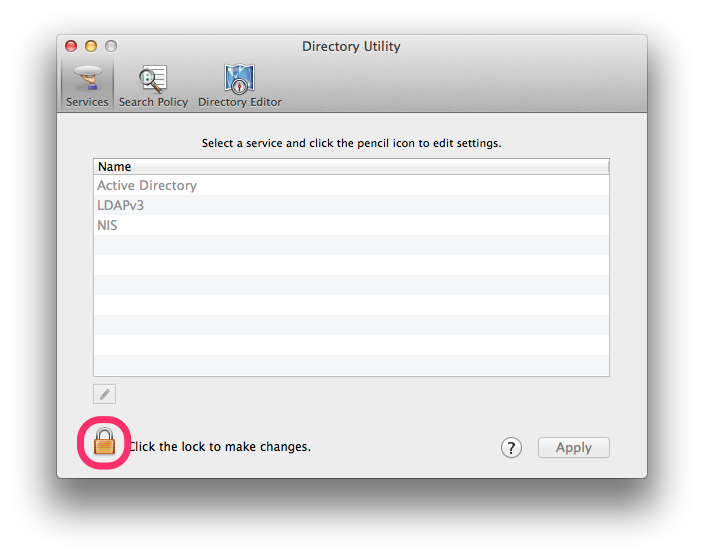
8. Enter the Administrator username and password then click the Modify Configuration button.
9. Click on the Edit Menu (top left of the screen)
10. Click on Enable Root User.

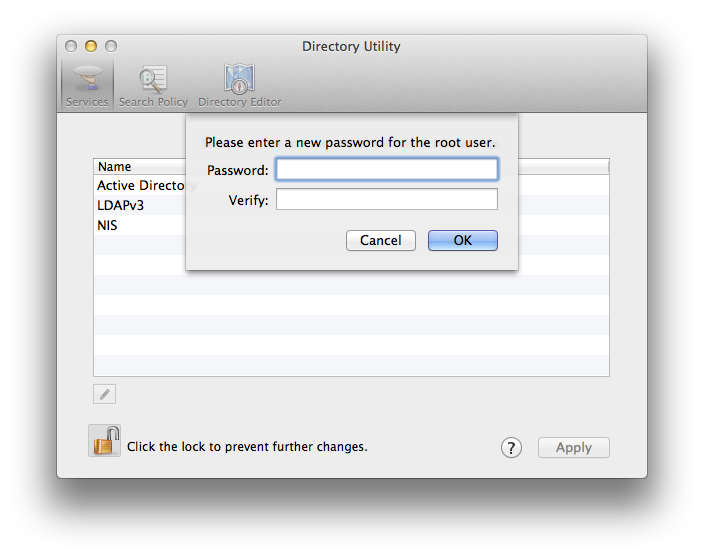
11. Set the root password then click the OK button.
The root user is now enabled. To use it you need to open the Terminal application and type the command su. You will be asked for a password (this will be the password you specified in the last step). Once you have finished using root (usually useful for installing tools that need to be installed via the command line) then it is recommended that you disable the root user when you’ve finished. The steps are similar to this tutorial accept you will select Disabled Root User in the Edit menu at the end.